4 Easy Breakfast Recipes That Will Impress Your Girlfriend

We all know what it’s like to be in our mid-twenties. We’re busy trying to figure out our lives, and we don’t always have time for silly things like breakfast. At least, that’s what we tell ourselves. Skipping the most important meal of the day can get complicated when your girlfriend has just spent the night, but have no fear!
Here are 4 easy breakfast recipes that will impress your girlfriend or significant other:
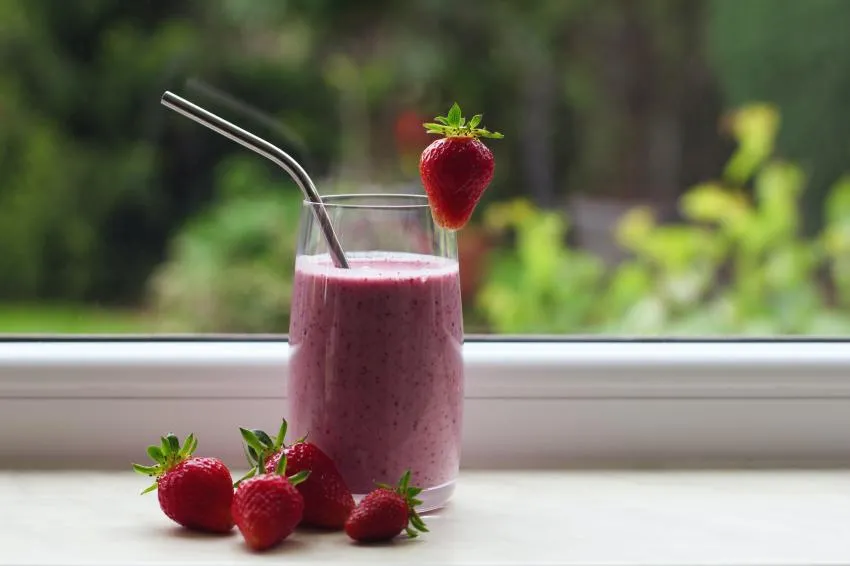
1. Strawberry and Banana Smoothie
"Oh, yeah, you blend." - Mona Lisa Vito, My Cousin Vinny (1992).
A perfect pair since the beginning of time! Making this flavourful duo a worthwhile breakfast is easy and fun!

Tools:
Gathering the tools you'll need for this recipe is one-stop shopping!
Blender - All you really need is a blender to concoct this delicious drink! Any type will do, even a food processor.
Paring Knife (Optional) - You're going to chop up some fruit, and a paring knife is perfect for strawberries and bananas. However, any sharp knife will work.
Ingredients:
Fruit, fruit, a veggie, more fruit, and some extra goodies! Let's make this easy, shall we?
Strawberries - Fresh strawberries are hard to come by all year round, but grabbing a bag of frozen strawberries can be just as tasty. Plus, frozen strawberries will help make your smoothie cold and refreshing. 5 strawberries will do nicely.
Banana - B-A-N-A-N-A banana! Simply pick up a batch of freshly ripened bananas and you're good to go. 1 banana per smoothie is recommended.
Spinach - This leaf will make you as strong as Popeye, adding much-needed protein to your smoothie. Fresh spinach is best. I recommend buying 1 small bundle but only throw a few leaves into the blender.
Plant-Based Protein Powder - There are tons of brands to choose from so just go with your gut. Some brands are Gainful, Orgain, or Optimum Nutrition. Flavors vary, but I highly recommend vanilla. 1 scoop from the measuring cup inside is recommended, which can vary between 1-3 Tablespoons.
Almond/Soy Milk - Whichever vegan milk brand you prefer to drink will pair nicely with this recipe!
Blueberries, Raspberries, and Blackberries (Optional) - These berries add extra oomph and flavor to your smoothie, but it's entirely up to you whether you toss them in.
Ice (Optional) - I find that I sometimes need a little ice to make my smoothie cold and thick.
Let's Cook!
All it takes is a good toss into the blender. Easy right?
Chop/Slice the Fruit - Use your paring knife to slice your strawberries in half, and your banana into thin slices side-to-side.
Slicing your fruit is important because smaller pieces help prevent the blender from getting clogged up.
(Optional) Raspberries, Blackberries, and Blueberries are already small enough and do not need to be sliced in half.
Add Spinach - 5 or so leaves should do the trick. I tend to rip each leaf in half as I toss them in, but this isn't a necessary step.
Add Protein Powder - It's time to scoop your protein powder. I typically add around 2 tablespoons, but the measurement is entirely up to personal preference.
Add Almond/Soy Milk - There's no such thing as a perfect measurement for this ingredient, but try starting with 1/4-1/2 Cup. You may need to add more later if your smoothie is too thick.
Add Ice (Optional) - I always add a handful of ice cubes so that my smoothie tastes cold and slushy. It also helps add thickness if it's too soupy.
Blend - Well, go ahead! Blend it up! Feel free to add some splashes of milk, ice, or even more fruit to help you find your ideal smoothie consistency. Enjoy!
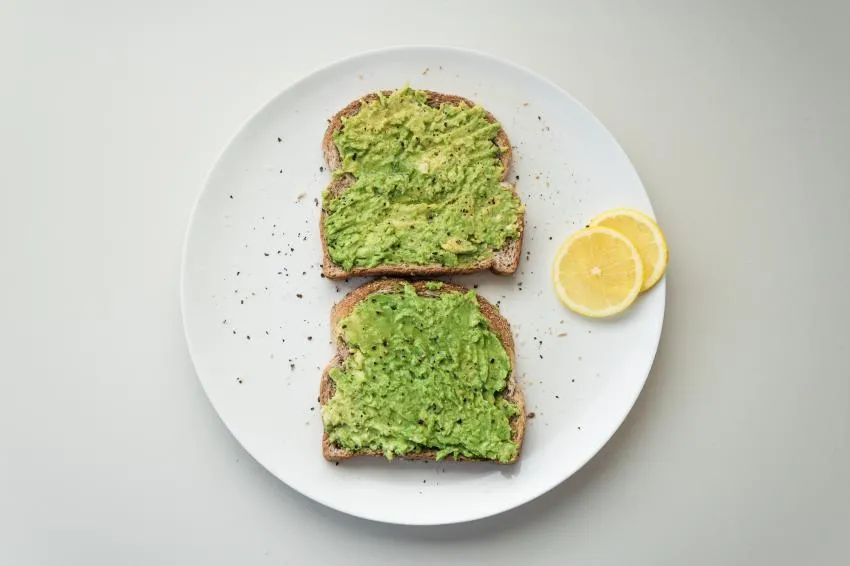
2. Avocado Toast
Now, I know what you’re thinking: “Only Gen-Z hipsters in Brooklyn eat avocado toast!” Yes, they do, but so does your girlfriend! This might be the easiest breakfast recipe I’ve ever laid eyes on, so let’s get started.

Tools:
As far as tools go, you truly only need one.
Dinner/Mixing Bowl
mashing your avocado is easiest in a dinner or mixing bowl and helps find that perfect consistency. Plus, if you decide to mix in any toppings early on then it’s best to use a bowl.
Frying Pan (Optional)
If you’re trying to look like a master chef, you can use a frying pan to toast your bread instead of a toaster. A pan with a 10-inch diameter or larger is best for giving yourself enough cooking space.
Cutting Board (Optional)
Avocado toast is normally made with mashed avocado, but if you’d rather slice it like a weirdo then a cutting board will help you out. Slicing avocado can get messy, so a nice flat surface works wonders for keeping your cooking station clean. A dinner plate is a great substitute if you’re short on cutting boards that day.
Ingredients:
Uh, hello? The ingredients are in the name!
Avocado - Picking a ripe avocado can be tricky if you’re a first-timer. You want it to be dark brown but not black, firm but not hard, and a tad soft but not mushy. Confusing? It is for me too. As long as you can squeeze it a little without it being mushy, you’re good to go. You’ll be able to tell if the avocado isn’t in good shape.
Toast - This recipe goes best with thick-sliced wheat bread. Avocado can get heavy, so it’s ideal to use a sturdy slice of bread. Plus, wheat bread is happy and healthy, and that’s what avocado toast is all about!
Avocado “toast” doesn’t have to be made with toast. Bagels are often used to make this same breakfast, so choose whichever fits your palette.
Toppings (Optional) - Avocado toast is all about the toppings, and there are tons to choose from. Here are some options:
Sesame seeds, pepper flakes, diced onions, tomato slices, balsamic vinegar, jalapenos, basil, cilantro, etc. The list is endless and is limited only by your imagination.
Olive Oil (Optional) - If you decide to toast your bread in a frying pan rather than a toaster, then you’ll need some olive oil to slick the pan and give that bread some extra flavor.
Let’s Cook!
Mash Your Avocado - Having your spread mashed and ready by the time your bread is freshly toasted is ideal for this recipe, so you should do it first. Cut open your avocado and scoop it out of its skin and into the mixing bowl.
Make sure to remove the pit, pieces of skin, or over-ripe brown bits before mashing. Now, just go ahead and mash!
Here’s your chance to add any ingredients like onions, lime, sesame seeds, etc. if you don’t wish to layer those on top later.
Slice Your Toppings (Optional) - If you’re adding tomatoes, onions, green peppers, jalapenos, or anything else in need of slicing, do it now.
Toast Your Bread - Easy, peasy, lemon squeezy. Melt some butter on your frying pan and place your piece of bread on top of it. Let it toast until golden brown around the edges, or until it’s got your desired crisp. You can fry at a medium-low temperature so you don’t accidentally burn it, and it should only take 1 minute or so.
Presentation! - Now’s your time to shine, and prove yourself as a culinary artist! The basics of avocado toast are simply that; avocado and toast. So, spread your avocado atop the bread, and start layering your toppings from there!
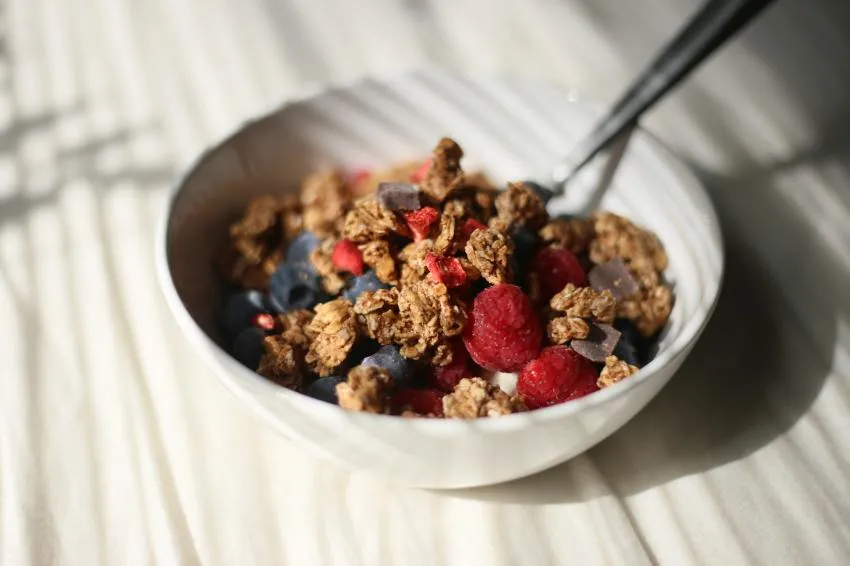
3. Oatmeal with Fruit
Haven’t had instant oatmeal since it had sugar dinosaur eggs? You’re not alone. But there’s a whole world of oatmeal recipes out there that are waiting to brighten your day!

Tools:
Talk about easy meal prep, this recipe calls for next to nothing!
Small Stove Pot - Some people microwave their oatmeal, but not us! You’ll need a small pot to boil some water on the stove.
Were you expecting more?
Ingredients:
Despite this meal being “instant,” it requires more ingredients than just oatmeal.
Oatmeal - Select an instant oatmeal brand and flavor of your choosing. For this recipe, I typically go with Original flavor with no added ingredients since we’ll be adding our own.
Blueberry Granola - Granola adds a crunchy texture to your oatmeal which makes it an essential ingredient. However, the flavor can be interchangeable. I recommend blueberry, but cinnamon, or original flavor, will taste great as well.
Frozen Fruit - Nothing pairs better with oatmeal and granola than fresh fruit. Well, sorta fresh. Frozen fruit conveniently provides a healthy, fresh taste on busy mornings, and livens up a sometimes dull flavored meal. This recipe works best with a medley of strawberries, blackberries, raspberries, and blueberries.
Let’s Cook!
Defrost Fruit - If you’re pulling your fruit straight out of the freezer then you’ll need to let it defrost. Pour your desired amount into a bowl, maybe around ½ - 1cup, and let it warm while you prep the other ingredients.
Boil Water - Microwaving oatmeal is for suckers! Depending on how much oatmeal you’re making you may want to boil ½ - 1 cup of water. However, it’s best to boil too much water rather than too little to leave yourself a margin of error; water evaporating away or needing more water to saturate your oatmeal.
Saturate Oatmeal - Once your water has come to a boil then it's time to saturate! This step is almost completely based on personal preference and doesn’t require any proper measurement.
Do you want your oatmeal soupy, or thick? If you like it thick, then pour in less water. And if you like it soupy, then pour in more water. No matter what you do just make sure the oatmeal is properly saturated, and not too dry.
P.S. if you find that your fruit isn’t defrosted feel free to place it in with the oatmeal while you add the boiling water. This will help defrost the fruit.
Add Granola - This step too, along with steps 5 and 6, is based on personal preference. Pour in however much you prefer. I typically go with a few shakes from the bag, which is around ¼-¾ cup.
Add Fruit - If you didn’t add the fruit in earlier, go ahead and do it now. Toss it all in, mix it around.
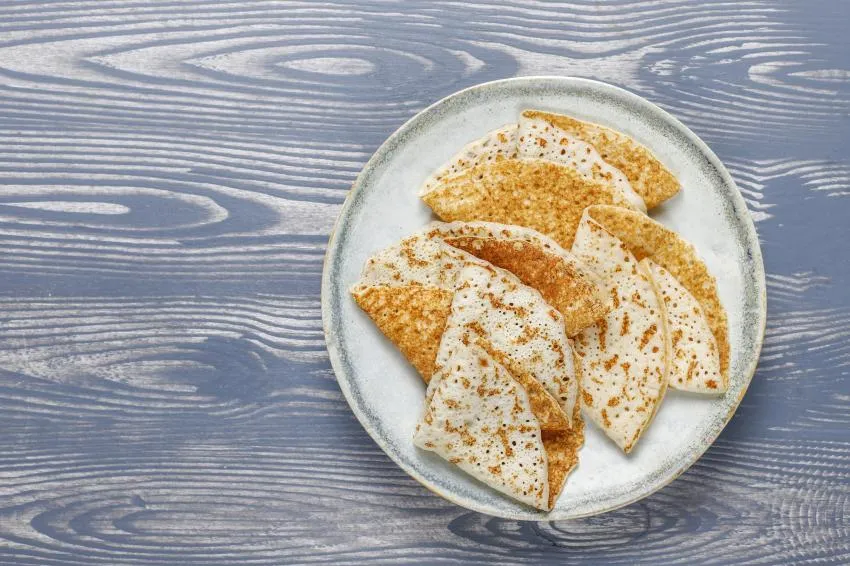
4. Gluten-Free Crepes
Who needs pancakes when you can have crepes?! Talk about boujee.

Tools:
Wow, collecting tools just gets easier and easier, doesn't it?
Mixing Bowl - To make things easy, use a large mixing bowl, upwards of 6 cups, so as to mix your ingredients freely.
Frying Pan - I always vote for non-stick frying pans, especially for delicate recipes such as crepes. Otherwise, make sure your pan is oiled to prevent sticking.
Whisk - Nothing helps a baker like a good whisk. Spoons work well in a pinch, but whisks are ideal for mixing every last drop into the perfect batter.
Spatula - I highly recommend a silicone spatula so as to prevent scratches on your pan. Also, silicone bends and is more malleable for checking the edges of your crepe.
Ingredients:
Behold! The healthiest list of ingredients you've ever seen!
Untoasted Buckwheat Flour - This all-natural flour is healthy and delicious. Just make sure it's untoasted and is pre-ground. 2 cups is ideal for you and a friend.
Flaxseed Meal - This fiber-filled, cholesterol-controlling ingredient is great for crepes! Bob's Red Mill is a good brand, but you can use whichever brand fits your preferences. 1+1/2 Tablespoons.
Oat Milk - This non-dairy substitute is great for cooking due to its creamy consistency. Add 2+1/2 Cups.
Sea Salt - Sea salt is wonderfully flavorful which is why I recommend it, but table salt will also make a decent crepe. 1-2 pinches are all that's needed.
Oil - Olive oil, avocado oil, canola oil, it's all well and good for this recipe. Not only will you need to add 2 Tablespoons to your mix, but you'll need it to grease the pan to prevent your crepes from sticking.
Agave Nector/Syrup (Optional) - This ingredient is used as an optional topping that adds some sweetness to your plate. It's kind of like maple syrup, but fancier.
Let's Cook!
Mix Flour, Flaxseed, Oat Milk, and Oil - Use your whisk to mix these ingredients into a smooth batter. Add a dash more flour if the mix appears too thin, or add more milk if it appears too thick.
Heat and Oil Frying Pan - Heat your pan to Medium Temperature, and spread a dash of oil across its surface so it's slick and ready for the batter.
Fry Your Crepes - Crepes are a lot like pancakes when it comes to frying. Pour roughly 1/4-1/3 cup of batter onto the frying pan, and let it cook until the top side bubbles and the edges can be lifted with the spatula. Then Flip! Each side should take approximately 3 minutes. Then repeat!
Presentation - Once your crepes are cooked and ready, you can now top or fill your crepe with almost anything you want. Agave nectar, maple syrup, fresh fruit, or granola make excellent crepe toppers.
Now you're a breakfast champion! I hope you and your significant other enjoyed these recipes and will continue to make them in the future! Enjoy!
Opinions and Perspectives
I tried the strawberry banana smoothie recipe this morning and it was amazing! Adding the spinach was genius, I couldn't even taste it but got all the nutrients.
These recipes look great but who has time to make crepes on a regular morning? I feel like that's more of a special occasion thing.
The avocado toast is my go-to! I love adding red pepper flakes and a poached egg on top. Really takes it to the next level.
Such a helpful article! My girlfriend always complains that I never cook for her, definitely going to surprise her with some of these this weekend.
Anyone else think it's weird they used oat milk for the crepes? I've always used regular milk and they turn out fine.
I make that smoothie every morning but I add chia seeds for extra protein. Keeps me full until lunch!
The oatmeal recipe seems really basic. I was hoping for something more creative there.
Actually the oatmeal suggestion is great because it's simple but customizable. I add cinnamon and honey to mine.
My crepes always end up looking like scrambled pancakes. Any tips on getting that perfect thin consistency?
The key is having your pan at the right temperature and using enough oil. Too hot and they'll burn, too cool and they'll stick.
I appreciate that these recipes are actually doable for beginners. Some cooking articles get way too complicated.
The smoothie recipe is spot on but I'd skip the protein powder. Natural ingredients taste better in my opinion.
Just made the avocado toast for my girlfriend and she loved it! Added some cherry tomatoes and everything bagel seasoning.
Am I the only one who thinks avocado toast is overrated? Give me a classic eggs and bacon any day.
You're missing out! Good avocado toast is like a creamy, savory heaven on bread. Try it with a soft boiled egg.
These are decent recipes but they're all pretty basic. Would've liked to see something more unique.
The buckwheat crepes are actually quite unique! Most people use regular flour. These are healthier too.
I never thought of using frozen berries in my oatmeal. Usually just use brown sugar but this sounds way better.
Anyone tried making the smoothie without spinach? Not sure my girlfriend would go for the green color.
Trust me, you can't taste the spinach at all and the berries keep it from looking too green.
Great breakfast ideas but where's the coffee recipe? That's the real way to impress your girlfriend!


